Welcome to the lab, please watch your step...

Welcome to the lab, please watch your step.... I'm a busy young zombie just trying to balance writing, food and life. I love to cook and love to eat even more! And I promise I won't eat your brains—unless they are made from cake, then I can make no promises.
This is where I run my experiments and post the results for your enjoyment. I have a weird sense of humor, so bare with me, I promise the food will be good ;)
Showing posts with label recipes. Show all posts

Wednesday, April 29, 2015

As American As... An Apple Pie Story

     I have a confession. As a child, I did not like pie. The only pie I liked was my moms Chicken Pot Pie. Cream pies, nut pies, fruit pies, those were strange and icky foods full of mystery ingredients. It wasn't until college that I saw the light.
Picture from Bettycrocker.com

     Apple pie.

     Buttery, flaky crust sandwiching layers of tender-crisp, sweet apples and cinnamon-y sweet sauciness. Just thinking about it makes my mouth water.

     The only problem? Making a pie in my dorm. You can't eat the whole thing in one sitting (or at least you SHOULDN'T) and there's no easy way to keep the leftovers in your mini-fridge.

     The solution?

     Apple Dumplings.

     All the same elements as the pie, only in convenient single serving packages, which can easily be stored in a tupperware. And honestly, they are so much easier! All my friends and family adore them, so now I share the secrets to apple-y bliss with you.

Apple Dumplings

Serves: 6
Time: 1 hour (approx)

Ingredients for Dumplings:
- 3 apples (buy a type that's good for pies. I like Fuji apples)
- 1 package pie crusts (yes, I cheat. If you want to make your dough more power to you!)
- 1 stick butter (minus 1 Tblsp)
- 1/2 cup white sugar
- 1 Tsp Cinnamon
- 1/2 tsp FRESH nutmeg (if you don't know why ask Alton Brown)

For Syrup:
- 2 cups water
- 2 cups sugar
- 1 Tblsp butter
- dash of cinnamon and grate of nutmeg

Directions:
Preheat oven to 400.

1) Peel, core, and cut apples in half.


2) Roll out pie crust and arrange apple halves evenly, cut side up. Cut dough into thirds.

3) Place a pat of butter into the hollow of each apple.


4) Mix sugar, cinnamon, and nutmeg.


5) Spoon cinnamon-sugar mixture over butter pat.

6) Fold edges of pie dough around the apple, creating a sealed package.


7) Place in a deep baking dish, approximately 1-2 inches apart.


8) Add another pat of butter atop each package, and sprinkle tops with remaining cinnamon-sugar.

9) Heat water, sugar, cinnamon and nutmeg to boiling in a small saucepan over medium heat. Add butter and reduce 3-5 minutes. 

10) Pour syrup AROUND (not on top of!) apple packages.

11) Bake for 20-25 minutes, or until crust turns golden brown.

12) Serve warm with vanilla ice cream, spoon sauce over both. Enjoy!


Saturday, August 9, 2014

Spices: Review and Chicken Curry

Last year my mom got a house down in Delaware near the Lewes and Rehoboth beaches.  In Rehoboth there is a spice shop called The Spice and Tea Exchange (www.spiceandtea.com) which I have walked into and oogled every time I go down for the past year.  Seriously, the smell of the place makes your mouth water.  I'd been wanting to buy some spices, but never had the money when I walked in (I have mentioned to you all how poor I am, right?).  So I simply oohed and aahed and dreamed. 

This time around I made certain I reserved a little money to buy some spices to try at home.  Now I'm generally a very simple cook.  I use a few staple herbs (from my awesome pot garden this summer!) and spices that I keep on hand for most every dish I make.  So as I was browsing I decided I would aim for some more exotic flavors that I've never tried.  These are what I ended up with:
From Left: Moroccan Seasoning, Malaysian Ginger Curry, Ginger Teriyaki

I've only had a chance to use one so far, the Malaysian Ginger Curry, and I used it to make—what else?—CURRY!  Now I've never been a huge fan of spicy food, and most curries are described as spicy, so for years I was afraid to try one.  Until one night several years ago when a friend we were living with invited us to share some he had made.  I was surprised how delicious it was.  So here I am, years later, trying to make it myself.
 **Warning: this is NOT a traditional Indian curry by any means.  It is an Americanized version.**

To review the spice blend first, I'd like to say that a little goes a long way.  As you can see from the picture above (which was taken after I made the curry) you can't tell I used any.  In fact I used 2 tsps and that was more than enough to give powerful flavor to the dish.  This particular blend has more dimension to it than the grocery store kind my friend used, so it makes for a much more interesting dish.


Mine came out a little thin, but thickened in fridge the next day

Crock-Pot Curry Chicken
Serves 4 with leftovers (or 2 for several days)
Ingredients:
  • 1 large chicken breast (you could also use boneless thighs) cut into 1" cubes
  • 1 Tblsp vegetable oil
  • 1 medium onion, diced
  • 2 garlic cloves, minced
  • 2 larger potatoes, cubed (I used red-skin potatoes)
  • 3-4 large carrots, cut into 1" chunks (thicker is better here)
  • 1/2 to 1 cup frozen peas
  • 1/2 cup cream (or milk)
  • 1 can condensed cream of chicken soup
  • 2 tsp curry powder 
  • Water (or homemade stock) to cover
  • Salt and Pepper to taste
  • Cornstarch to thicken (if desired)
Directions:
  1. Heat vegetable oil in non-stick skillet over medium heat.
  2. Cube chicken breast and season with salt, pepper, and a pinch of curry seasoning.
  3. Brown chicken in skillet on all sides.  Remove from pan and set into bottom of crock-pot or slow-cooker.
  4. Sweat onions in skillet to soften.  Add garlic after 2 minutes.  Once onions and garlic take on a soft, translucent look add them to crock-pot.
  5. Add carrots and potatoes to crock-pot.
  6. Add condensed soup, cream/milk, water/stock and curry seasoning.
  7. Stir to combine.  Salt and Pepper to taste.  Cover and set on low for 4-6 hours.
  8. 10-15 minutes before serving, add frozen peas.
  9. If curry is too thin for your taste, mix 1 Tblsp cornstarch and 1-2 Tblsp water and add to curry a few minutes before serving (leave pot uncovered for best thickening results).
  10. Serve over rice and enjoy!


Tuesday, May 6, 2014

The Very BEST Chicken Fingers You Will Ever Eat!

I'm home sick from work (for the second day in a row) and I just couldn't sleep anymore.  So I decided I had neglected you all for long enough, it's time for another recipe.  I actually have a whole ton of pictures I've taken of recipes I want to share with you, but the past several months my time has been dominated by the final semester of my Master's program.

Now, my thesis is in and classes are completed, so I can once again dedicate more time to you all!  I'm sure you're just overjoyed.

Okay, this isn't why you're here.  You're here because of the title.  I promised the very best chicken fingers you've ever had.  "How can she really make that claim?" you might ask. 

I make the claim because they are that good!  I got the original recipe from The Pioneer Woman.  I had one chicken breast thawed, no vegetables (so I couldn't make my go-to Stir Fry), and a half a container of buttermilk leftover from making cupcakes.  I needed to feed my boyfriend, who was becoming hangrier (that moment when hungry and angry meet) by the second.  I found her recipe for Chicken tenders and it was a light at the end of the tunnel. (You can find her recipe here)

Since that first encounter I find myself keeping buttermilk on hand much more often.  It's a cheap ingredient, but it makes all the difference in these strips.  I suppose you could use an egg wash, but then they wouldn't be the Best you've ever tasted.

Now, the Pioneer Woman—while I absolutely LOVE her—doesn't use too much seasoning for this recipe.  As a (semi) reformed picky eater, I can appreciate the simplicity.  But I thought these tenders could do with a little pick-me-up of flavor.  So I employed the flavor commandments I have learned from years of watching Food Network.

Firstly, that you should—and shall—season at every level of the process to develop deep flavors.

And Secondly, that there is no "wrong" combination of flavors.

So I experimented, and the following is the recipe I came up with.

Best Chicken Fingers of Your Life
Ingredients:
1 large skinless, boneless chicken breast cut into strips (PW gets the pre-cut strips, I find it's cheaper to do the cutting myself)
Buttermilk, enough to cover with about 1/4-1/2 cup left-over (sometimes you can find this in Pint sizes which should be enough—I've yet to find smaller than a quart though)
1 1/2 cups flour
Salt and Pepper (to taste)
Paprika
Garlic Powder
Poultry seasoning

Directions:
1) Cut chicken breast into strips.

2) add 1/2 tsp Paprika, 1/2 tsp Garlic powder, and 1/2 tsp poultry seasoning to buttermilk, as well as a dash of salt and a grind or two of pepper.  Mix together, the buttermilk should turn a light salmon pink.

3) Soak the Chicken strips in the buttermilk mixture.  Let marinate at least 15 minutes.

4) In a separate bowl mix 1 and 1/2 cups flour with another 1 tsp each of Paprika, Garlic powder and Poultry seasoning, as well as some salt and pepper. (Are you starting to see this seasoning every layer yet?)

5) Mix together with a fork.  While mixing the flour, drizzle in a little of the leftover buttermilk at a time (anywhere from 1/4 cup to 1/2 cup in total).  There will be some clumps, which is okay, just try to keep them on the smaller side.

6) Heat 1 inch of vegetable oil in a skillet over medium-low to medium heat.  Check that the heat is correct by sprinkling a little flour over the oil.  It should bubble.

7) Take soaked strips, a couple at a time, and dredge through the flour mixture. Gingerly shake off any excess and set aside.  The clumps from the buttermilk drizzle will cling to the chicken and create crispy bites of fried deliciousness.

8) Once the oil is hot and you have enough dredged, drop the strips into the oil a few at a time—be careful not to over-crowd the pan!  Cook strips about 1-2 minutes per side,or until they get beautiful and golden brown.
I usually dredge the next batch while the first one is cooking.

9) Once done cooking, remove the strips to a paper-towel lined plate to drain excess grease.  Once all the strips are cooked, serve with french fries or potato chips—or just a little side of ketchup or bbq sauce.  Whoever you make them for, they won't stay on the plate for long (unless they're vegetarian...but then I bet you could easily find other things to fry up in this buttermilk dredge)


Once you try these, no pre-frozen diner or fast-food finger will ever measure up.  And the best part is how easy the recipe is to experiment with!  Add your own spices, try some cayenne for a spicy kick, or a little Cajun seasoning for some zing!  Try some 5-spice and ginger for an Asian flare.  Throw the strips on top of salad or in a wrap, or cut them into bite size pieces and serve them as nuggets to the kids.


Wednesday, January 29, 2014

Underrated Winter Vegetables and Lamb Stew

After using a gift card my boyfriend and I got this past Christmas, I found myself with a nicely sized bit of leftover rack of lamb.  Naturally I took the bones home and added what other bones I had in the freezer, making some beautiful lamb stock.  This brought me to my favorite thing to do with lamb in the winter.

Lamb stew.

One of the first meals I really mastered, stew is a delicious cold-weather treat.  I love the coming of winter because it means I get to break out my crock-pot and make stews and soups to my hearts content.

As I grow older and more experienced in the food world, I find myself searching for new ingredients to enrich my winter-time favorites.  Frozen corn added into chili to add sweetness against the heat, red wine to braise venison sausage to serve over spaetzle.  But for lamb and beef stew, the players have always remained the same.  Carrots, onion, and potato.  That list grew as of early this winter.

The Story:
I had 1 parsnip in my fridge, leftover from another recipe I had made.  Shrugging, I washed and chopped the white carrot look-a-like, adding it to the pot.  My ancestors in Ireland and Germany used parsnips in soups and stews for centuries—long before potatoes made their way out of America.  I figured it couldn't hurt to try.

I was rewarded with a level of nuttiness I would have never expected.  Paired with the earthiness of the carrots, the sauce gained so much depth from adding just that one ingredient.

Then I started to think "What other vegetables have I been over-looking in the store because I've never tried them?"

The answer came as I was reading a traditional Irish recipe.

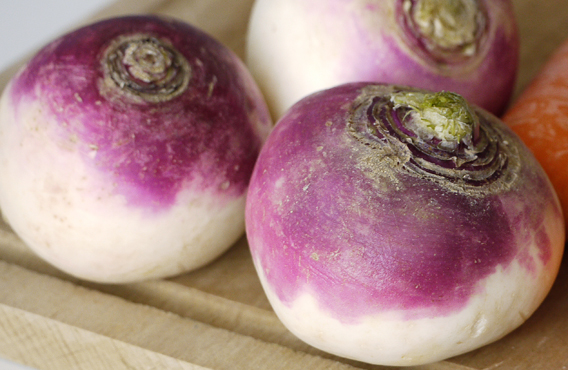
Photo from inspiredrd.com


Turnips.

My mother had never used them.  She thought because they were shaped like beets they must taste like beets.  She hates beets. 

My father swears he hates them, but won't try even the smallest bite. (And they wonder why I was so picky as a child!) 

I had always assumed turnips must not taste good, since neither of my parents seemed to like them.  And so I never tried them for myself.  As an adult, I realized how blind I was letting myself be, and decided to take a culinary leap. I bought one at the store one day (it was surprisingly cheap).

I was going to be brave.

I took the cream and purple root home and researched them—wondering what a person did with a turnip.  Did it need to be peeled? cored? Can you eat the green bits at the top?  Should a "white" turnip have purple on it?

The internet was forthcoming with answers and opinions. No they don't need to be peeled, but some recipes call for it anyway.  Nutritionists recommend keeping the skin because it holds a lot of the nutrients.  So just wash it.  No, there is no coring.  Yes, you can eat the greens on top.  They are often served similar to Kale or any other hearty leafy green.  Yes, some white turnips have purple on them. 

So what did I do with that first turnip?
I roasted it alongside some butternut squash, parsnips, onions and carrots.  I liked it more than the parsnips!  Why? Because the flavor is muted.  It's a starchy vegetable—like a potato—with a smooth texture.  It soaks up flavor, but isn't as heavy or dense as a potato can be.  And well, they're good for you! Vitamin C and A, and Calcium and Copper and Antioxidants.

So what's the best part about parsnips and turnips? They are cold weather vegetables.  Winter is their season, so they are cheaper.  And they pack a lot of nutritional punch.  For the monetarily challenged foodie (i.e. Me) you can't get enough ingredients to help stretch your pantry.

So now that I've gone on my "try some new vegetables" rant, let's get onto the stew.

The ZombieQueen's Super Fancy (They won't know it was so Cheap) Lamb Stew
Part 1: Stock, Theory, and Economics
So I mentioned in passing today to cheer up my boyfriend that we were having Lamb Stew for dinner.  My Father, in his infinite need to indicate to me that I am living outside my means, responds that he wishes HE could afford lamb stew.  You see, when people hear "lamb" their minds automatically go to fancy restaurants that charge $30+ for a few lamb lollipops.  So people think lamb is just one of those meats they can never afford.


Which is totally bogus!  You just have to know what you're looking for.  Stewing is one of those applications where you can take the cheapest cuts and make good use of them.  Personally I am always looking through the meat aisle at my grocer for what is on sale.  And you'd be surprised how cheap some things can get.  Today I found some lovely lamb neck bones, about a lb, for $1.67 (Picture is from a later batch—still not bad for $2.60).  I also will use shank cross-sections.  Any cut where there is generally a lot of connective tissue and bone to work around are usually the cheapest (in today's case, even cheaper than beef!).  And the nice thing about lamb is that even the toughest parts are pretty darn tender.

This is what the start of something awesome looks like.
Once you get it home, there is a bit of work involved with separating meat and bones/silver-skin/inedible bits.  NEVER throw the bones etc away!  There is so much flavor packed into such a small amount of scraps.  I keep a plastic baggy in my freezer to store up extra bits of everything (cooked or uncooked) whether it be the leftover chicken bones, pork chops, ham hoks, beef ribs you name it.  Bones go in the baggy.  Once it's full I know it is time to make some homemade stock.  Throw whatever veggies you have roughly chopped into a big stock pot (and yes I use the celery tops and carrot tops as herbs!), let them get soft with some butter and salt and pepper.  Add in your bones and bits, cover with water, bring to a boil and then simmer for hours until it smells so good you just want to hook it up to an IV.

This stock is the elixir of life, you can add it to anything.  Making a roast? Put a little stock in the pan.  People will be asking you the secret to your gravy. Making pasta? Add a little of your stock to a pan and use it to make a sauce.

So now we've discussed the theory and economics, let's progress to the recipe.

Part 2: Recipe (aka What You Really Came Here For)
Ingredients:
1 med onion
2 carrots
1 parsnip (do NOT peel!)
1 turnip (Again, no peeling.  Wash only)
1 larger red potato (I like red potatoes in stew b/c they don't get grainy) ((ditto on the peeling for this—really if you wash any of these vegetables you don't need to peel them!))
1 clove garlic (or more if you like)
1 cup frozen veggies (I like green beans personally)
1 package  lamb shank or neck bones (trimmed and deboned) cut into bite size pieces
((Yes I said package.  Why? Well because I usually use the whole thing.  Some days I have more meat  and the stew is meatier, some days I have more bones and the stock is richer.  It's win-win in my book))
Enough stock to cover (if you don't have homemade that's ok.  Canned broth works fine, but taste before adding any extra salt.  Or you can use my favorite secret weapon—1 tblsp Better Than Bouillon)
1 bay leaf
1 tsp dry thyme
salt and pepper to taste
1 tblsp cornstarch to thicken

Instructions:

1) Heat some oil in a pan over medium-medium high heat. 
Salt and pepper lamb pieces and then dust with some flour (this will help thicken the stew later).  Once oil is heated, add lamb to the pan.  You just want to brown the pieces, not cook them fully.  Turn over once to brown the other side and add to your crock-pot.

2) Wash and chop vegetables (other than the frozen).  All should be bite size pieces.  Add to the crock-pot.
3) Add stock, herbs, and salt and pepper.
4) Cook on high for 4 hours, or on low for 6.
5) Add frozen veggies 5-10 minutes before serving.
6) Make slurry of cornstarch and a little water.  Add while stirring into stew.
7) Serve with some warm biscuits or crusty bread on a cold night.  Enjoy!

Saturday, October 12, 2013

A Long Overdue Return to Blogging with Harvest Soup!

I've been away from the site for awhile, found myself in a graduate program for creative writing and working as a school bus driver when not writing for class.  So, things have been busy in the house.  I've made lots of meals and items I've wanted to share with you all but never found the time.  With this recipe I decided to make the time.

I made this soup for a fundraiser at work, a Soup,Chili, and Bakesale to help a local foodbank.  It was so popular it sold out in the first 15 minutes of the sale!  I was super excited when I heard how much people had liked it.  So I thought, I've got some people who really want the recipe—why not put up the step by step on my blog?  So here, my peace offering for keeping away so long.

The Zombie Cooks
Harvest Soup

Hardware:
Large Dutch Oven
Sharp knife
Peeler
Spoon for seeding
Blender

Ingredients:
1 butternut squash (around 1-2 lbs)
1 apple (I suggest a type that is tart and good for sauce-making, because we want it to break down)
3 parsnips (or a 1lb bag)
2 large carrots
1 large sweet onion
2-3 celery stalks
Chicken stock to cover (I used about 4 cups) home-made is preffered
1 cup Half-and-half
1 tsp dried thyme (if using fresh remember to use more!)
Salt and Pepper to taste
Nutmeg (fresh only!)
Cayenne Pepper (optional and to taste)
Butter
Cooking oil
Sour Cream to top for serving

Directions:
1) In large dutch oven melt 2 tblsp butter over medium low.  Add 1 tblsp oil to prevent burning.  Chop onion and celery, add to pan to sweat.

2) Peel and remove seeds from butternut squash.  I always suggest getting one from your local farm.  Why? Well the cost for butternut squash in season at the grocery store is around $1.29 per lb.  At your local farm store? $0.69 per lb. This really can be a great cheap, healthy meal for those on a budget.  Not sure how to go about peeling and seeding?  Here's a video from Good Housekeeping to help.  I find using a pumpkin spoon or melon spoon (one that has a serrated edge of some kind) much easier when removing seeds and pulp.

 3) Chop squash into 1/2 to 1 inch pieces.  Measurement doesn't really matter as long as they are all around the same size for even cooking.  Add to pot and let soften.

4) Peel and chop carrots, add to pot.

5) Parsnips:  You may be tempted—because a parsnip looks just like a white carrot—to peel it like a carrot.  Some recipes even tell you to peel them.  DON'T DO IT!  All peeling a parsnip does is get rid of all the sweet, vitamin rich skin (don't believe me? Ask Alton Brown) and you're left with the woody interior while you throw the best part (the part you really paid for) down the disposal.
Wash your parsnips, like you would a potato.  Once washed, trim the ends and chop.  Add to the pot.

6) Core apple, remove skin and chop.  You want a firm apple for this, again something best bought at a local farm store or orchard.  Why?  Cost again is the main factor, but more than that you are garunteed freshness and a local orchard will be able to provide the home cook with greater variety to choose from.  Many farm stores have descriptions and suggested uses for each apple type, but if not ask which apple's are tart and best for things like apple sauce.

7) Salt and Pepper as you cook.  I like to add salt and pepper at each stage of the process to create the greatest depth of flavor.  This is something you should really apply to every meal you cook (except dessert).

8) Allow vegetables to soften, stirring occasionally, about 10 minutes.  You should start to see the squash and apple breaking down.  If it gets too dry at the bottom of the pot, add another tblsp of butter.  If veggies start browning, turn down the heat.

9) Once veggies have softened add Chicken Stock.  Liquid should come about an inch above the veggies.  Home-made stock is, of course, preferred, but sometimes we're too busy to make it.  Carton stock or broth works just fine, though I'd suggest the low sodium kind.  Or if you want to get really economical, I use Better Than Bouillon, a sort of bouillon paste you add warm water to.  Not as much salt as the cubes, with the ability to control the flavor concentration.  Vegetable stock or bouillon paste will also work to make this dish completely vegetarian!

10) Add bay leaf, thyme, and another round of salt and pepper, tasting as you go..  Grate about 1 tsp fresh nutmeg into soup—a little goes a long way.  Why is fresh so important? If you've ever watched Good Eats with Alton Brown, you know.  Whole nutmegs can keep nearly forever, while the pre-ground stuff ends up tasting like sawdust after a few months.  Once you taste fresh nutmeg, you'll never go back!  Bring soup to a boil, then lower heat to allow it to simmer for 30 minutes. Stirring occasionally.

11) Remove soup from heat, add half-and-half, stirring while you add.

12) Allow soup to sit off the heat to cool for 10 minutes, then add a spoonful or two at a time to your blender.  Blend until smooth, then transfer to a large bowl or tupperware for serving/preserving.  Repeat until all is blended smooth.  At this point you want to taste, add salt and pepper if needed.  If you want to add cayenne now is the time.  Even if you don't like things spicy (which I admit, I don't) a 1/2 tsp of cayenne will add another level to this soup.  The heat from the spice warms up the sweetness, making it more savory.  For an added touch, grate a little more nutmeg on top just before serving.  People will be begging for your secret to that nutty flavor.

13) Serve warm with a dollop of sour cream, or freeze and reheat on a cold, rainy night.

Picture copyright Dan Goldberg, Sunset 2006 (Jalapeño-Ginger Butternut Squash Soup)
Found at myrecipes.com


Wednesday, July 6, 2011

The Wonders of Ramen

     I was reading an article earlier today about how hard times are and what people have to do to get by.  I was reminded of my college days when I was at my poorest.  Naturally the memories called to my mind were of scrounging dimes from my car floor to buy a packet of ramen from the store.

Most every college student has had their moments eating only ramen, and anyone can tell you it gets boring quickly.  However there are many resources out there for the monetarily challenged to get the most out of that ramen package.  I did a little digging and here I offer some of the ones I thought sounded the yummiest (and craziest!).  The breakfast burrito sounds especially yummy (and could possibly be done in a microwave)

1) Broccoli and Ramen Noodle Salad
allrecipes.com

Ingredients
1 (16 ounce) package broccoli coleslaw mix
2 (3 ounce) packages chicken flavored ramen noodles
1 bunch green onions, chopped
1 cup unsalted peanuts
1 cup sunflower seeds
1/2 cup white sugar
1/4 cup vegetable oil
1/3 cup cider vinegar

Directions

In a large salad bowl, combine the slaw, broken noodles and green onions.

Whisk together the sugar, oil, vinegar and ramen seasoning packets. Pour over salad and toss to evenly coat. Refrigerate until chilled; top with peanuts and sunflower seeds before serving. 


2) Ramen Breakfast Burritos

Ingredients

2 cups water

1 pack Ramen noodles (any flavor you like) 

1 egg  

1/4 cup shredded cheese  

hot sauce (if desired) 

flour tortillas 

Directions 

Boil ramen noodles. Beat egg until scrambled and add to boiling ramen. Cook until done.  Drain all but 1 tablespoon water. Stir in seasoning packet, cup shredded cheese and a dash or two of hot sauce. Wrap flavored noodles in warm tortillas for breakfast burritos.


Here are some others to check out:

Noodle Pepperoni Pizza 

Ramen Stew 

Enjoy and try to make your own modification on this cheap staple!

Nom Noms,

-Z.Q.

Thursday, May 26, 2011

Braised Green Beans with Red Wine, Shallots and Prosciutto

As promised, I have rescued the pictures of my contribution to Easter dinner, and I will now share them with all of you, as well as the recipe.  Aren't you lucky!  This is one of those dishes that really wows a crowd, if you are stuck making a vegetable for a family get together (like me) or need to bring something to a potluck, this dish is sure to impress.  I'll tell you a secret, it SOUNDS really hard to make, but it is surprisingly simple. It also works well as a nice dinner side to impress the one you love *hint hint guys*.  I hope you all try this recipe and enjoy it.

Braised Green Beans with Red Wine, Shallots, and Prosciutto
Serves: 4      Time: 30 mins (after snapping)

Ingredients:
1 lb fresh green string beans (preferably local)
4-5 slices of prosciutto
3-4 shallots (or 1 small onion)
1-2 cloves of garlic
1/2 cup Red Wine
Salt and Pepper to taste

Directions:
     Step 1:  Trim ends from fresh green beans.  This is a perfect job for small kids or teenagers who are vegged out in front of the computer.  Get those idle hands to work!  Rinse beans lightly to make sure there is no left over dirt or leaves.  Pat dry.

Step 2:     Heat enough olive oil in a large skillet (or for really large batches, a Wok) to cover bottom.  Heat over medium heat and add prosciutto.  Cook prosciutto like you would a piece of bacon, until caramelized and golden brown on both sides (See picture above).  You can substitute bacon in this, but the prosciutto adds a lighter, super thin crunch in the end. Remove cooked prosciutto to a plate with a paper towel and allow to cool.


Step 3:     Lower heat to medium low and add shallots and garlic.  Cook until they just soften.  Add the green beans to the pan and toss with garlic and shallots.  Cook over medium low for approximately 2 minutes (still bright and crisp).


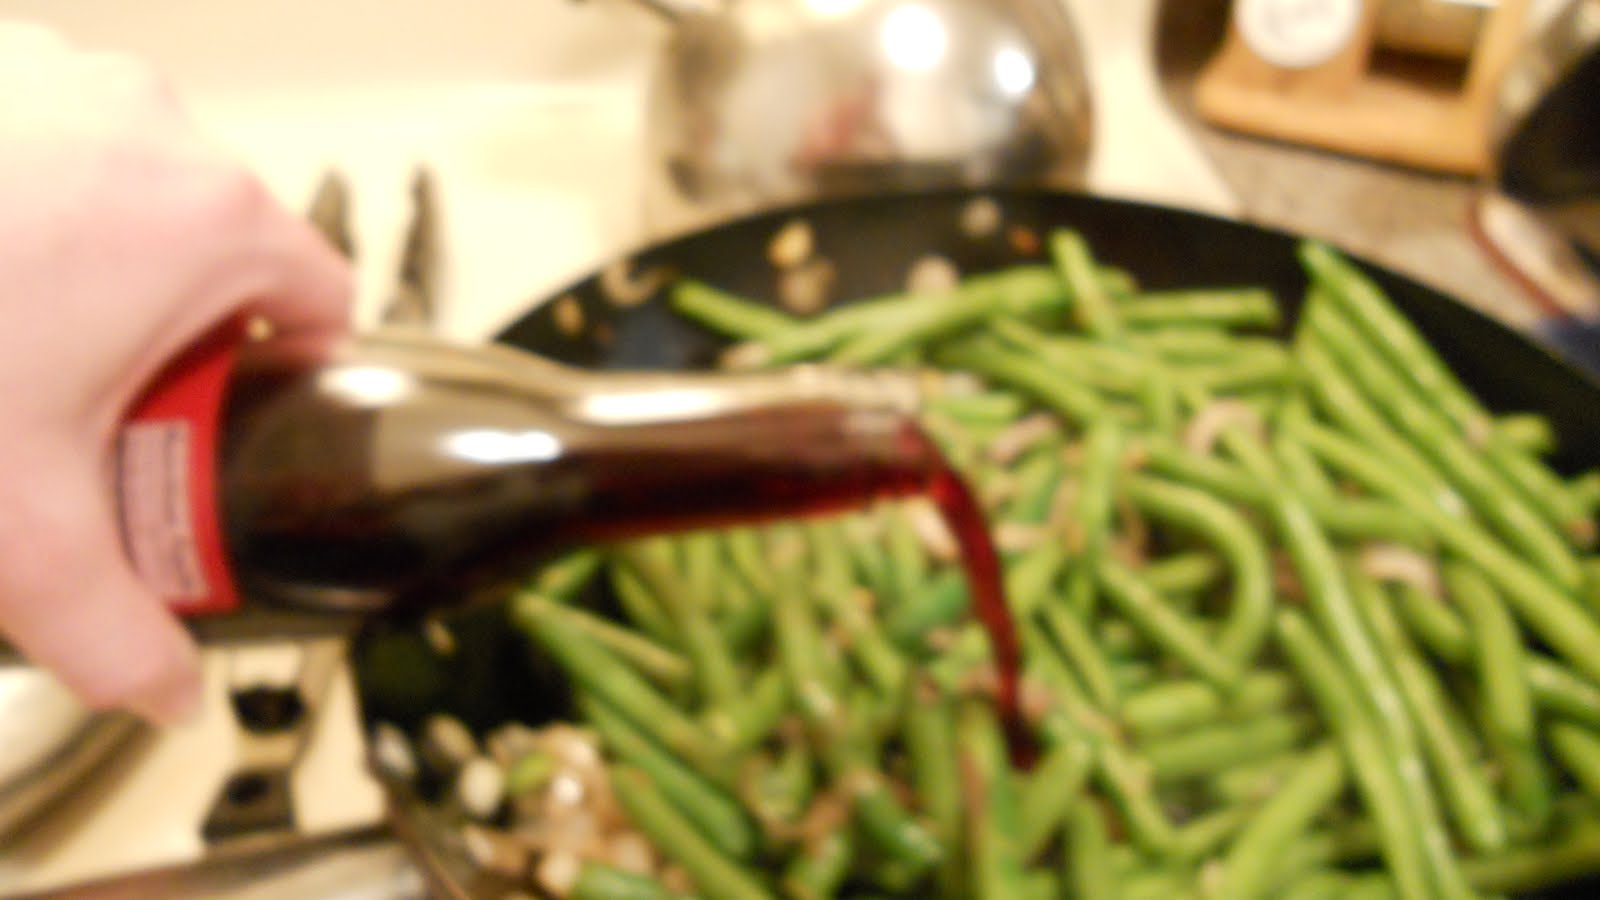
Step 4:     Add the wine (please forgive my blurry picture, the camera was being uncooperative and kept focusing on the steam -_- ).  Remember to use a wine that you will drink.  No need to waste a whole bottle of wine just for one recipe right? 


Step 5:  Bring wine to a simmer in the pan and cover.  Let simmer for 2-3 minutes.  Remove lid and let liquid reduce for another 2-3 minutes.


Step 6:     While beans are simmering roughly chop the cooled prosciutto.


Step 7:      When wine is reduced and dish is ready to be served, it should resemble the pictures above.  Beans should still be slightly crisp but shallots should be soft and rich.  Salt and pepper to taste before removing from pan.


Step 8:     Transfer beans to a serving platter.  Add half of chopped prosciutto and stir into mixture.  Reserve second half to place at table for guests to crumble over their plate.


I will be away at a Pow-Wow with my friend's family this weekend, hopefully I will have some interesting new dishes to share with you when I return!  Until then, enjoy and remember the zombie's view on brains:
                                                               "Use them or Lose them!"

Nom noms,
- Z.Q.

Tuesday, March 15, 2011

Thyme Pork Chops with Pasta and Garlic Cream sauce


As promised (ok maybe a day late, but it's better than never)the delicious meal I made the other night. Thyme pork chops with pasta and garlic cream sauce. It's so easy and filling. I only have 2 people to cook for so this is a two serving (and nothing is exact) recipe.

Ingredients:
2 pork chops
1 tsp dried thyme
1 pinch of paprika
salt and pepper to taste
Olive oil (or vegetable oil if you're poor like me) enough to coat bottom of pan
1 handful of pasta (however much you normally eat)
fresh or frozen veggies ( I used 1 carrot and frozen corn, but you can use whatever you have on hand)
1 small onion
2 cloves of garlic
Philadelphia Garlic Cooking Cream

How To:
Boil water and throw in pasta.

Season pork chops with salt, pepper, thyme and a pinch of paprika. Heat oil in pan over medium/ med low heat and brown meat. After browning on both sides set chops aside to rest. In the same pan cook onions and garlic until soft. Add vegetables and cover, cooking a few minutes until veggies are thawed but slightly crisp. Stir in several big spoonfuls of Philadelphia Garlic Cooking Cream (you could do it with any of the others too. (Or just plain cream cheese and whatever seasonings you want!)

Drain pasta and add into pan. Toss pasta with veggies and sauce. Pile on a plate and place chops on top. Then just dig in and enjoy! Personally I think this is going to be a new comfort meal for me. I can't wait to make it again, and I hope that some of you out there will enjoy it as well