We've all had those days. The ones when you haven't been to the store in days and you've got limited ingredients and a hungry family (or in my case, a hungry hubby and pregnant self). Cobbling together something cohesive to eat can seem a daunting task.
This was the conundrum I was faced with tonight. How to feed 2 (and a half, if you include the baby belly) on one pork chop. And this wasn't a nice thick cut chop that I could butterfly and pound out. It was a thin chop.
So what do you do?
Well I took stock of what other ingredients I had on hand: half a head of broccoli, a handful of baby carrots, a packet of ramen noodles, and a myriad of spices and sauces.
One of the staple sauces I like to keep in my pantry is ready-made teriyaki sauce (I know, I know, homemade is better—but seriously, who has the time!?).
Stir-fry is one of those dishes you can't really mess up. You just throw whatever you have on hand into a wok, toss on a sauce and put it over rice or noodles. It's extremely economical because rice and noodles are cheap ($0.15/pack of ramen feeds 2 people) and you don't need a lot of protein (or any) to make a hearty meal.
Stir Fry is more a formula than a recipe.
Protein (or extra Veg) + 2(or more) vegetables + Sauce + Rice/Noodle + High Heat = Yummy
For example, my dinner tonight read as follows:
Pork chop + (Broccoli + Carrots) + Teriyaki + Ramen
Each element can be substituted or replaced according to what you have on hand.
The HOW is the real important point here.
When it comes to your proteins, quick, hot cooking is key. I like to slice my meats into thin strips, this provides maximum surface area for quick browning and flavor development. I have found that I can feed 4 people with 1 chicken breast (always buy the ones with rib meat. They are cheaper and more meat!).
Next I season my meat (salt, pepper, garlic seasoning if you like) and then dredge it in corn starch. The cornstarch will create a great crispy exterior.
Make sure all your veg are prepped and sliced in bite size pieces.
Next get your rice and or noodles cooking.
Heat your wok super hot (med-high heat) with a little cooking oil. Once the oil shimmers, add your meat. Once you've got it nice and brown, add the heartier veggies (broccoli, carrots, squashes) and cook till tender/crisp. Add sauce, heat through and serve.
((EDIT: I apologize for the lack of pictures. I had taken a great one—I swear—but my cellphone corrupted the picture >.<))
Showing posts with label cooking. Show all posts
Showing posts with label cooking. Show all posts
Tuesday, July 5, 2016


Wednesday, January 29, 2014
Underrated Winter Vegetables and Lamb Stew
After using a gift card my boyfriend and I got this past Christmas, I found myself with a nicely sized bit of leftover rack of lamb. Naturally I took the bones home and added what other bones I had in the freezer, making some beautiful lamb stock. This brought me to my favorite thing to do with lamb in the winter.
Lamb stew.
One of the first meals I really mastered, stew is a delicious cold-weather treat. I love the coming of winter because it means I get to break out my crock-pot and make stews and soups to my hearts content.
As I grow older and more experienced in the food world, I find myself searching for new ingredients to enrich my winter-time favorites. Frozen corn added into chili to add sweetness against the heat, red wine to braise venison sausage to serve over spaetzle. But for lamb and beef stew, the players have always remained the same. Carrots, onion, and potato. That list grew as of early this winter.
The Story:
I had 1 parsnip in my fridge, leftover from another recipe I had made. Shrugging, I washed and chopped the white carrot look-a-like, adding it to the pot. My ancestors in Ireland and Germany used parsnips in soups and stews for centuries—long before potatoes made their way out of America. I figured it couldn't hurt to try.
I was rewarded with a level of nuttiness I would have never expected. Paired with the earthiness of the carrots, the sauce gained so much depth from adding just that one ingredient.
Then I started to think "What other vegetables have I been over-looking in the store because I've never tried them?"
The answer came as I was reading a traditional Irish recipe.
Turnips.
My mother had never used them. She thought because they were shaped like beets they must taste like beets. She hates beets.
My father swears he hates them, but won't try even the smallest bite. (And they wonder why I was so picky as a child!)
I had always assumed turnips must not taste good, since neither of my parents seemed to like them. And so I never tried them for myself. As an adult, I realized how blind I was letting myself be, and decided to take a culinary leap. I bought one at the store one day (it was surprisingly cheap).
I was going to be brave.
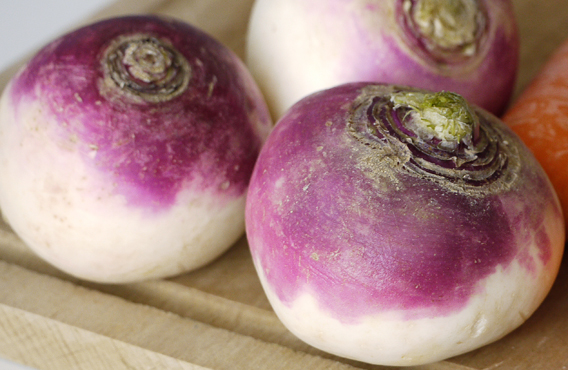
I took the cream and purple root home and researched them—wondering what a person did with a turnip. Did it need to be peeled? cored? Can you eat the green bits at the top? Should a "white" turnip have purple on it?
The internet was forthcoming with answers and opinions. No they don't need to be peeled, but some recipes call for it anyway. Nutritionists recommend keeping the skin because it holds a lot of the nutrients. So just wash it. No, there is no coring. Yes, you can eat the greens on top. They are often served similar to Kale or any other hearty leafy green. Yes, some white turnips have purple on them.
So what did I do with that first turnip?
I roasted it alongside some butternut squash, parsnips, onions and carrots. I liked it more than the parsnips! Why? Because the flavor is muted. It's a starchy vegetable—like a potato—with a smooth texture. It soaks up flavor, but isn't as heavy or dense as a potato can be. And well, they're good for you! Vitamin C and A, and Calcium and Copper and Antioxidants.
So what's the best part about parsnips and turnips? They are cold weather vegetables. Winter is their season, so they are cheaper. And they pack a lot of nutritional punch. For the monetarily challenged foodie (i.e. Me) you can't get enough ingredients to help stretch your pantry.
So now that I've gone on my "try some new vegetables" rant, let's get onto the stew.
The ZombieQueen's Super Fancy (They won't know it was so Cheap) Lamb Stew
Part 1: Stock, Theory, and Economics
So I mentioned in passing today to cheer up my boyfriend that we were having Lamb Stew for dinner. My Father, in his infinite need to indicate to me that I am living outside my means, responds that he wishes HE could afford lamb stew. You see, when people hear "lamb" their minds automatically go to fancy restaurants that charge $30+ for a few lamb lollipops. So people think lamb is just one of those meats they can never afford.

 Which is totally bogus! You just have to know what you're looking for. Stewing is one of those applications where you can take the cheapest cuts and make good use of them. Personally I am always looking through the meat aisle at my grocer for what is on sale. And you'd be surprised how cheap some things can get. Today I found some lovely lamb neck bones, about a lb, for $1.67 (Picture is from a later batch—still not bad for $2.60). I also will use shank cross-sections. Any cut where there is generally a lot of connective tissue and bone to work around are usually the cheapest (in today's case, even cheaper than beef!). And the nice thing about lamb is that even the toughest parts are pretty darn tender.
Once you get it home, there is a bit of work involved with separating meat and bones/silver-skin/inedible bits. NEVER throw the bones etc away! There is so much flavor packed into such a small amount of scraps. I keep a plastic baggy in my freezer to store up extra bits of everything (cooked or uncooked) whether it be the leftover chicken bones, pork chops, ham hoks, beef ribs you name it. Bones go in the baggy. Once it's full I know it is time to make some homemade stock. Throw whatever veggies you have roughly chopped into a big stock pot (and yes I use the celery tops and carrot tops as herbs!), let them get soft with some butter and salt and pepper. Add in your bones and bits, cover with water, bring to a boil and then simmer for hours until it smells so good you just want to hook it up to an IV.
This stock is the elixir of life, you can add it to anything. Making a roast? Put a little stock in the pan. People will be asking you the secret to your gravy. Making pasta? Add a little of your stock to a pan and use it to make a sauce.
So now we've discussed the theory and economics, let's progress to the recipe.
Part 2: Recipe (aka What You Really Came Here For)
Ingredients:
1 med onion
2 carrots
1 parsnip (do NOT peel!)
1 turnip (Again, no peeling. Wash only)
1 larger red potato (I like red potatoes in stew b/c they don't get grainy) ((ditto on the peeling for this—really if you wash any of these vegetables you don't need to peel them!))
1 clove garlic (or more if you like)
1 cup frozen veggies (I like green beans personally)
1 package lamb shank or neck bones (trimmed and deboned) cut into bite size pieces
((Yes I said package. Why? Well because I usually use the whole thing. Some days I have more meat and the stew is meatier, some days I have more bones and the stock is richer. It's win-win in my book))
Enough stock to cover (if you don't have homemade that's ok. Canned broth works fine, but taste before adding any extra salt. Or you can use my favorite secret weapon—1 tblsp Better Than Bouillon)
1 bay leaf
1 tsp dry thyme
salt and pepper to taste
1 tblsp cornstarch to thicken
Instructions:
1) Heat some oil in a pan over medium-medium high heat.
Salt and pepper lamb pieces and then dust with some flour (this will help thicken the stew later). Once oil is heated, add lamb to the pan. You just want to brown the pieces, not cook them fully. Turn over once to brown the other side and add to your crock-pot.
2) Wash and chop vegetables (other than the frozen). All should be bite size pieces. Add to the crock-pot.
3) Add stock, herbs, and salt and pepper.
4) Cook on high for 4 hours, or on low for 6.
5) Add frozen veggies 5-10 minutes before serving.
6) Make slurry of cornstarch and a little water. Add while stirring into stew.
7) Serve with some warm biscuits or crusty bread on a cold night. Enjoy!
Lamb stew.
One of the first meals I really mastered, stew is a delicious cold-weather treat. I love the coming of winter because it means I get to break out my crock-pot and make stews and soups to my hearts content.
As I grow older and more experienced in the food world, I find myself searching for new ingredients to enrich my winter-time favorites. Frozen corn added into chili to add sweetness against the heat, red wine to braise venison sausage to serve over spaetzle. But for lamb and beef stew, the players have always remained the same. Carrots, onion, and potato. That list grew as of early this winter.
The Story:
I had 1 parsnip in my fridge, leftover from another recipe I had made. Shrugging, I washed and chopped the white carrot look-a-like, adding it to the pot. My ancestors in Ireland and Germany used parsnips in soups and stews for centuries—long before potatoes made their way out of America. I figured it couldn't hurt to try.
I was rewarded with a level of nuttiness I would have never expected. Paired with the earthiness of the carrots, the sauce gained so much depth from adding just that one ingredient.
Then I started to think "What other vegetables have I been over-looking in the store because I've never tried them?"
The answer came as I was reading a traditional Irish recipe.
 |
| Photo from inspiredrd.com |
Turnips.
My mother had never used them. She thought because they were shaped like beets they must taste like beets. She hates beets.
My father swears he hates them, but won't try even the smallest bite. (And they wonder why I was so picky as a child!)
I had always assumed turnips must not taste good, since neither of my parents seemed to like them. And so I never tried them for myself. As an adult, I realized how blind I was letting myself be, and decided to take a culinary leap. I bought one at the store one day (it was surprisingly cheap).
I was going to be brave.
I took the cream and purple root home and researched them—wondering what a person did with a turnip. Did it need to be peeled? cored? Can you eat the green bits at the top? Should a "white" turnip have purple on it?
The internet was forthcoming with answers and opinions. No they don't need to be peeled, but some recipes call for it anyway. Nutritionists recommend keeping the skin because it holds a lot of the nutrients. So just wash it. No, there is no coring. Yes, you can eat the greens on top. They are often served similar to Kale or any other hearty leafy green. Yes, some white turnips have purple on them.
So what did I do with that first turnip?
I roasted it alongside some butternut squash, parsnips, onions and carrots. I liked it more than the parsnips! Why? Because the flavor is muted. It's a starchy vegetable—like a potato—with a smooth texture. It soaks up flavor, but isn't as heavy or dense as a potato can be. And well, they're good for you! Vitamin C and A, and Calcium and Copper and Antioxidants.
So what's the best part about parsnips and turnips? They are cold weather vegetables. Winter is their season, so they are cheaper. And they pack a lot of nutritional punch. For the monetarily challenged foodie (i.e. Me) you can't get enough ingredients to help stretch your pantry.
So now that I've gone on my "try some new vegetables" rant, let's get onto the stew.
The ZombieQueen's Super Fancy (They won't know it was so Cheap) Lamb Stew
Part 1: Stock, Theory, and Economics
So I mentioned in passing today to cheer up my boyfriend that we were having Lamb Stew for dinner. My Father, in his infinite need to indicate to me that I am living outside my means, responds that he wishes HE could afford lamb stew. You see, when people hear "lamb" their minds automatically go to fancy restaurants that charge $30+ for a few lamb lollipops. So people think lamb is just one of those meats they can never afford.
 |
| This is what the start of something awesome looks like. |
This stock is the elixir of life, you can add it to anything. Making a roast? Put a little stock in the pan. People will be asking you the secret to your gravy. Making pasta? Add a little of your stock to a pan and use it to make a sauce.
So now we've discussed the theory and economics, let's progress to the recipe.
Part 2: Recipe (aka What You Really Came Here For)
Ingredients:
1 med onion
2 carrots
1 parsnip (do NOT peel!)
1 turnip (Again, no peeling. Wash only)
1 larger red potato (I like red potatoes in stew b/c they don't get grainy) ((ditto on the peeling for this—really if you wash any of these vegetables you don't need to peel them!))
1 clove garlic (or more if you like)
1 cup frozen veggies (I like green beans personally)
1 package lamb shank or neck bones (trimmed and deboned) cut into bite size pieces
((Yes I said package. Why? Well because I usually use the whole thing. Some days I have more meat and the stew is meatier, some days I have more bones and the stock is richer. It's win-win in my book))
Enough stock to cover (if you don't have homemade that's ok. Canned broth works fine, but taste before adding any extra salt. Or you can use my favorite secret weapon—1 tblsp Better Than Bouillon)
1 bay leaf
1 tsp dry thyme
salt and pepper to taste
1 tblsp cornstarch to thicken
Instructions:


1) Heat some oil in a pan over medium-medium high heat.
Salt and pepper lamb pieces and then dust with some flour (this will help thicken the stew later). Once oil is heated, add lamb to the pan. You just want to brown the pieces, not cook them fully. Turn over once to brown the other side and add to your crock-pot.
2) Wash and chop vegetables (other than the frozen). All should be bite size pieces. Add to the crock-pot.
3) Add stock, herbs, and salt and pepper.
4) Cook on high for 4 hours, or on low for 6.
5) Add frozen veggies 5-10 minutes before serving.
6) Make slurry of cornstarch and a little water. Add while stirring into stew.
7) Serve with some warm biscuits or crusty bread on a cold night. Enjoy!
Wednesday, July 6, 2011
The Wonders of Ramen
I was reading an article earlier today about how hard times are and what people have to do to get by. I was reminded of my college days when I was at my poorest. Naturally the memories called to my mind were of scrounging dimes from my car floor to buy a packet of ramen from the store.
Most every college student has had their moments eating only ramen, and anyone can tell you it gets boring quickly. However there are many resources out there for the monetarily challenged to get the most out of that ramen package. I did a little digging and here I offer some of the ones I thought sounded the yummiest (and craziest!). The breakfast burrito sounds especially yummy (and could possibly be done in a microwave)
1) Broccoli and Ramen Noodle Salad
allrecipes.com
Ingredients
Most every college student has had their moments eating only ramen, and anyone can tell you it gets boring quickly. However there are many resources out there for the monetarily challenged to get the most out of that ramen package. I did a little digging and here I offer some of the ones I thought sounded the yummiest (and craziest!). The breakfast burrito sounds especially yummy (and could possibly be done in a microwave)
1) Broccoli and Ramen Noodle Salad
allrecipes.com
Ingredients
1 (16 ounce) package broccoli coleslaw mix
2 (3 ounce) packages chicken flavored ramen noodles
1 bunch green onions, chopped
1 cup unsalted peanuts
1 cup sunflower seeds
1/2 cup white sugar
1/4 cup vegetable oil
1/3 cup cider vinegar
Directions
In a large salad bowl, combine the slaw, broken noodles and green onions.
Whisk together the sugar, oil, vinegar and ramen seasoning packets. Pour over salad and toss to evenly coat. Refrigerate until chilled; top with peanuts and sunflower seeds before serving.
2) Ramen Breakfast Burritos
Ingredients
2 cups water
1 pack Ramen noodles (any flavor you like)
1 egg
1/4 cup shredded cheese
hot sauce (if desired)
flour tortillas
Directions
Boil ramen noodles. Beat egg until scrambled and add to boiling ramen. Cook until done. Drain all but 1 tablespoon water. Stir in seasoning packet, cup shredded cheese and a dash or two of hot sauce. Wrap flavored noodles in warm tortillas for breakfast burritos.
Here are some others to check out:
Noodle Pepperoni Pizza
Ramen Stew
Enjoy and try to make your own modification on this cheap staple!
Nom Noms,
-Z.Q.
Thursday, May 26, 2011
Braised Green Beans with Red Wine, Shallots and Prosciutto
As promised, I have rescued the pictures of my contribution to Easter dinner, and I will now share them with all of you, as well as the recipe. Aren't you lucky! This is one of those dishes that really wows a crowd, if you are stuck making a vegetable for a family get together (like me) or need to bring something to a potluck, this dish is sure to impress. I'll tell you a secret, it SOUNDS really hard to make, but it is surprisingly simple. It also works well as a nice dinner side to impress the one you love *hint hint guys*. I hope you all try this recipe and enjoy it.

Braised Green Beans with Red Wine, Shallots, and Prosciutto
Serves: 4 Time: 30 mins (after snapping)
Ingredients:
1 lb fresh green string beans (preferably local)
4-5 slices of prosciutto
3-4 shallots (or 1 small onion)
1-2 cloves of garlic
1/2 cup Red Wine
Salt and Pepper to taste
Directions:
Step 1: Trim ends from fresh green beans. This is a perfect job for small kids or teenagers who are vegged out in front of the computer. Get those idle hands to work! Rinse beans lightly to make sure there is no left over dirt or leaves. Pat dry.
 Step 2: Heat enough olive oil in a large skillet (or for really large batches, a Wok) to cover bottom. Heat over medium heat and add prosciutto. Cook prosciutto like you would a piece of bacon, until caramelized and golden brown on both sides (See picture above). You can substitute bacon in this, but the prosciutto adds a lighter, super thin crunch in the end. Remove cooked prosciutto to a plate with a paper towel and allow to cool.

Step 3: Lower heat to medium low and add shallots and garlic. Cook until they just soften. Add the green beans to the pan and toss with garlic and shallots. Cook over medium low for approximately 2 minutes (still bright and crisp).

Step 4: Add the wine (please forgive my blurry picture, the camera was being uncooperative and kept focusing on the steam -_- ). Remember to use a wine that you will drink. No need to waste a whole bottle of wine just for one recipe right?

Step 5: Bring wine to a simmer in the pan and cover. Let simmer for 2-3 minutes. Remove lid and let liquid reduce for another 2-3 minutes.

Step 6: While beans are simmering roughly chop the cooled prosciutto.


Step 7: When wine is reduced and dish is ready to be served, it should resemble the pictures above. Beans should still be slightly crisp but shallots should be soft and rich. Salt and pepper to taste before removing from pan.

Step 8: Transfer beans to a serving platter. Add half of chopped prosciutto and stir into mixture. Reserve second half to place at table for guests to crumble over their plate.
I will be away at a Pow-Wow with my friend's family this weekend, hopefully I will have some interesting new dishes to share with you when I return! Until then, enjoy and remember the zombie's view on brains:
"Use them or Lose them!"
Nom noms,
- Z.Q.

Braised Green Beans with Red Wine, Shallots, and Prosciutto
Serves: 4 Time: 30 mins (after snapping)
Ingredients:
1 lb fresh green string beans (preferably local)
4-5 slices of prosciutto
3-4 shallots (or 1 small onion)
1-2 cloves of garlic
1/2 cup Red Wine
Salt and Pepper to taste
Directions:
Step 1: Trim ends from fresh green beans. This is a perfect job for small kids or teenagers who are vegged out in front of the computer. Get those idle hands to work! Rinse beans lightly to make sure there is no left over dirt or leaves. Pat dry.


Step 3: Lower heat to medium low and add shallots and garlic. Cook until they just soften. Add the green beans to the pan and toss with garlic and shallots. Cook over medium low for approximately 2 minutes (still bright and crisp).
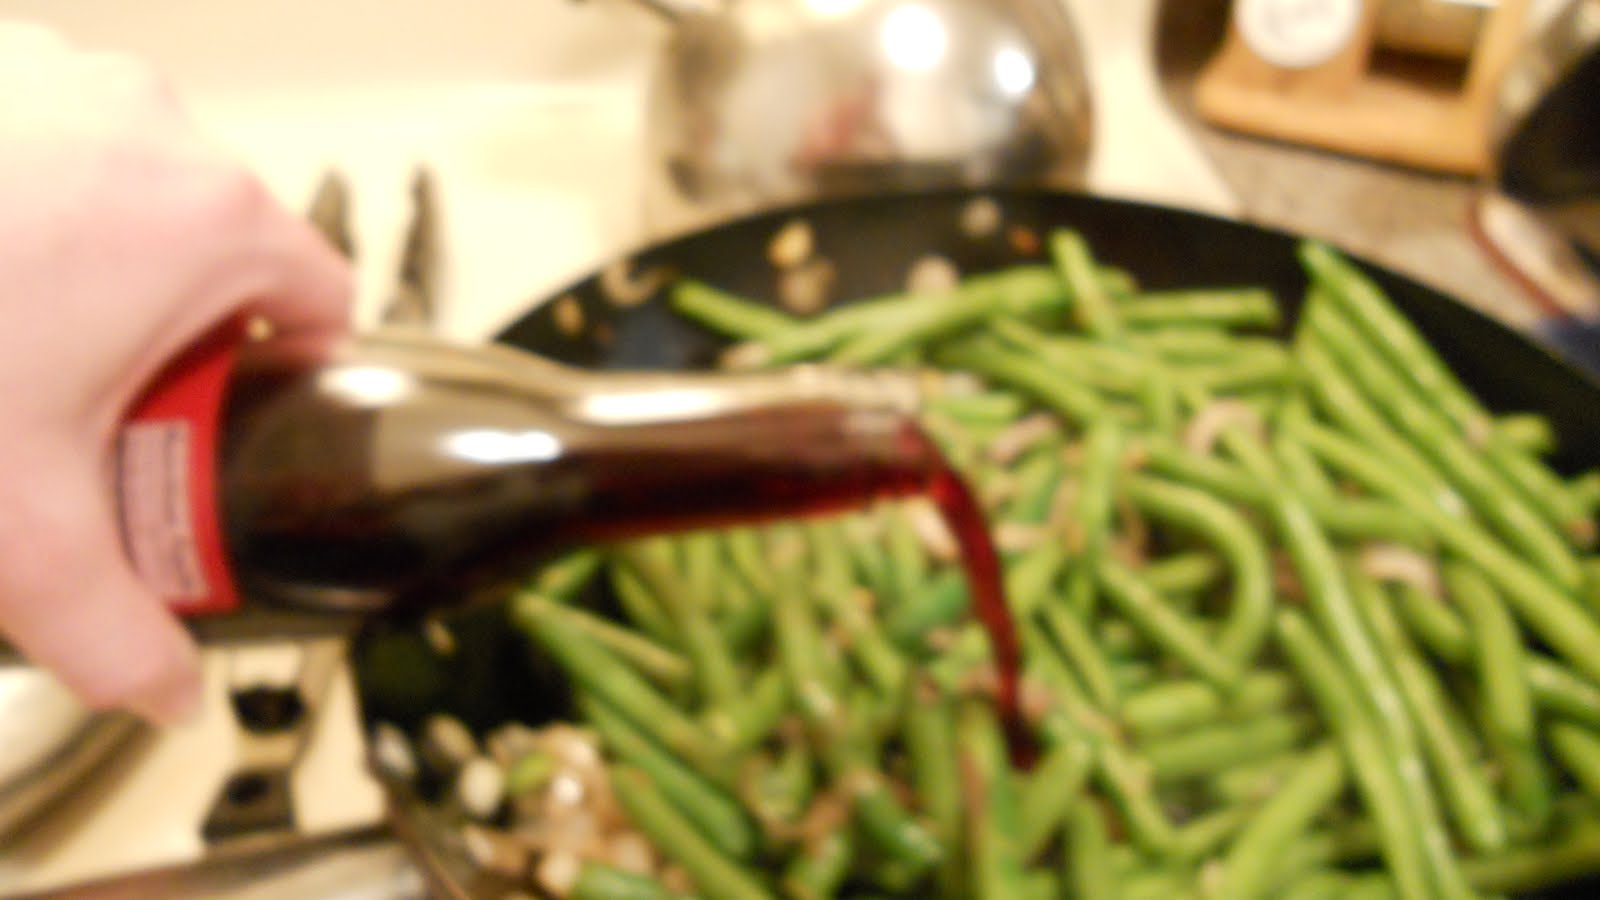
Step 4: Add the wine (please forgive my blurry picture, the camera was being uncooperative and kept focusing on the steam -_- ). Remember to use a wine that you will drink. No need to waste a whole bottle of wine just for one recipe right?

Step 5: Bring wine to a simmer in the pan and cover. Let simmer for 2-3 minutes. Remove lid and let liquid reduce for another 2-3 minutes.

Step 6: While beans are simmering roughly chop the cooled prosciutto.


Step 7: When wine is reduced and dish is ready to be served, it should resemble the pictures above. Beans should still be slightly crisp but shallots should be soft and rich. Salt and pepper to taste before removing from pan.

Step 8: Transfer beans to a serving platter. Add half of chopped prosciutto and stir into mixture. Reserve second half to place at table for guests to crumble over their plate.
I will be away at a Pow-Wow with my friend's family this weekend, hopefully I will have some interesting new dishes to share with you when I return! Until then, enjoy and remember the zombie's view on brains:
"Use them or Lose them!"
Nom noms,
- Z.Q.
Subscribe to:
Posts (Atom)