Welcome to the lab, please watch your step...

Welcome to the lab, please watch your step.... I'm a busy young zombie just trying to balance writing, food and life. I love to cook and love to eat even more! And I promise I won't eat your brains—unless they are made from cake, then I can make no promises.
This is where I run my experiments and post the results for your enjoyment. I have a weird sense of humor, so bare with me, I promise the food will be good ;)
Showing posts with label quick dinner. Show all posts

Tuesday, October 4, 2016

Thrifty Dinner: Kaese Spätzle or Cheesy German Egg Noodles

As hubby and I have been saving for our new house, we've been having a lot of thrifty dinners lately. But that doesn't mean you have to skimp on flavor! We're moving to our new house in two weeks, so I've been trying to use up some of our pantry to lighten the move.

I come from a german family, and if there is one thing germans are good at, it is stretching staples. Now, my family is originally from Bavaria so rather than traditional german spätzle I grew up eating big fluffy knödels (we'll save those for another time though). But when my Opa remarried, my new Oma brought spätzle into the picture. And we loved it.

Spätzle is really a very simple pasta, it's just a few staple ingredients (which most everyone has at all times) and can be combined with any number of sauces and vegetables, as a side or the star dish. The noodles are delicate but filling, so a little goes a long way. It's similar in its simplicity to Italian gnocchi.

Some recipes you find will call for fancy spätzle presses or boards, but I've found you can make do with a large holed colander and a spatula (or there is the cutting-board fling method, but that hurts my arm after awhile).

So let's get into the recipe, that's why you're really here afterall!

Basic Spätzle
makes 4 main or 6 side servings
Ingredients:
1 cup all-purpose flour
2 eggs
1/4 cup milk
1/2 tsp freshly grated nutmeg (optional)
1/2 tsp salt
fresh ground black pepper to taste

Hardware:
1 large pot of salted boiling water
1 medium mixing bowl
1 electric mixer or a whisk
1 colander with large holes
1 rubber spatula
1 spider, or draining spoon for noodle removal
1 saute pan with butter standing by

Directions:
1) Mix flour, nutmeg, salt and pepper in a medium bowl.
2) Measure milk into liquid measuring cup. Add eggs and beat until mixed.
3) Add wet ingredients into dry in installments, mixing thoroughly with either a whisk or electric mixer until it makes a smooth batter. Batter should be thicker than pancake batter, but still drippy.
4) Pot of boiling water should be softly boiling (not huge rolling boil, just consistent even bubbles).
5) Over boiling water add half of batter into the colander and use the spatula to push the batter through the holes. I suggest holding the colander about 4-5 inches above the pot to prevent the steam from cooking the batter in the colander.
6) Once all of the first installment of the batter is through give the noodles a gentle stir in the pot to make sure they do not clump together. Cook for 3-5 minutes
7) Remove spätzle from water with a draining spoon or spider and transfer to either a paper towel to drain or into a pan with butter.
8) Repeat with the second batch. Optional, but highly recommended: Saute spätzle in butter until lightly browned. Use as a side with roast pork, or jager schnitzel, or serve with a riesling cream sauce and spinach. Or follow to Kaese Spätzle recipe below.

Kaese Spätzle (aka the Original Mac'n'cheese)
Ingredients:
1 recipe Spätzle
1 small onion, sliced
Butter to saute vegetables
1 cup shredded cheese (traditionally Emmental or Gruyere, but you can use what you like/have)
Optional ingredients: spinach, mushrooms, winter squash, kale, etc. I used spinach because that's what I had.

Hardware:
1 saute pan

Directions:
1) Melt butter in pan. Add sliced onions and cook over medium-low heat until caramelized and soft. If you are using mushrooms or any hearty vegetables add them now and cook down with the onions.
2) Add Spätzle to the pan and brown slightly.
3) Add Spinach or other greens. Saute until wilted.
4) Turn off heat, add cheese. Mix to distribute and melt the cheese.
5) Serve and enjoy!

Tuesday, July 5, 2016

Thrifty Dinner: Stir Fry

We've all had those days. The ones when you haven't been to the store in days and you've got limited ingredients and a hungry family (or in my case, a hungry hubby and pregnant self). Cobbling together something cohesive to eat can seem a daunting task.

This was the conundrum I was faced with tonight. How to feed 2 (and a half, if you include the baby belly) on one pork chop. And this wasn't a nice thick cut chop that I could butterfly and pound out. It was a thin chop.

So what do you do?

Well I took stock of what other ingredients I had on hand: half a head of broccoli, a handful of baby carrots, a packet of ramen noodles, and a myriad of spices and sauces.

One of the staple sauces I like to keep in my pantry is ready-made teriyaki sauce (I know, I know, homemade is better—but seriously, who has the time!?).

Stir-fry is one of those dishes you can't really mess up. You just throw whatever you have on hand into a wok, toss on a sauce and put it over rice or noodles. It's extremely economical because rice and noodles are cheap ($0.15/pack of ramen feeds 2 people) and you don't need a lot of protein (or any) to make a hearty meal.

Stir Fry is more a formula than a recipe.
Protein (or extra Veg) + 2(or more) vegetables + Sauce + Rice/Noodle + High Heat = Yummy

For example, my dinner tonight read as follows:
Pork chop + (Broccoli + Carrots) + Teriyaki + Ramen

Each element can be substituted or replaced according to what you have on hand.

The HOW is the real important point here.
When it comes to your proteins, quick, hot cooking is key. I like to slice my meats into thin strips, this provides maximum surface area for quick browning and flavor development. I have found that I can feed 4 people with 1 chicken breast (always buy the ones with rib meat. They are cheaper and more meat!).

Next I season my meat (salt, pepper, garlic seasoning if you like) and then dredge it in corn starch. The cornstarch will create a great crispy exterior.

Make sure all your veg are prepped and sliced in bite size pieces.

Next get your rice and or noodles cooking.

Heat your wok super hot (med-high heat) with a little cooking oil. Once the oil shimmers, add your meat. Once you've got it nice and brown, add the heartier veggies (broccoli, carrots, squashes) and cook till tender/crisp. Add sauce, heat through and serve.

((EDIT: I apologize for the lack of pictures. I had taken a great one—I swear—but my cellphone corrupted the picture >.<))

Sunday, August 31, 2014

Un-stuffed Cabbage

So I made this last night and put a photo up on facebook.  People (mostly my cousins) exploded wanting me to share the recipe.  So here it is ^_^

Un-Stuffed Cabbage
This is a great one-pot week night meal.  And a great way to sneak some vegetables into your kids tummies!  You can use brown rice instead of white in this recipe, but be sure to add more liquid and let it cook a little longer.

 Ingredients:
  • 1 lb ground beef (I used 1/2 lb ground pork b/c it was cheaper and I just had 2 people to feed)
  • 1 small onion, chopped
  • 1/2 bell pepper, chopped
  • 2 cloves garlic, minced
  • 1 cup white rice (you could increase this to 2 if you have more people to feed, but remember to increase the liquid!)
  • 2 cups beef stock (or whatever stock/bouillon you have on hand)
  • 1 cup tomato sauce (or an 8 oz can.  You can also use a can of tomato soup)
  • 1/2 head of cabbage, chopped or shredded
  • 1/2or 1 teaspoon paprika (depending on your taste)
  • 1/4 teaspoon cayenne
  • Salt and pepper to taste
 Directions:
  1.   In a large, wide pan with a lid, heat 1 tblsp vegetable oil over medium heat.  Saute onion and pepper until softened and slightly translucent.  Add garlic and saute until fragrant.
  2. Add ground beef and brown.  
  3. Add paprika and cayenne.
  4. Add rice and toast till golden.
  5. Pour in beef broth and tomato sauce.  Stir to combine—make sure to scrape up any rice sticking to bottom of pan.  Add salt and pepper to taste.
  6. Cover and let simmer. 7 minutes.  Keep an eye on the moisture level (some rices absorb more than others).
  7. Uncover, stir and add in chopped cabbage.  Add more liquid if necessary.  
  8. Recover and simmer until cabbage is tender and rice is cooked (another 5-10 minutes).
  9. Serve and enjoy!  Makes 4 servings with lots of leftovers!

Tuesday, May 6, 2014

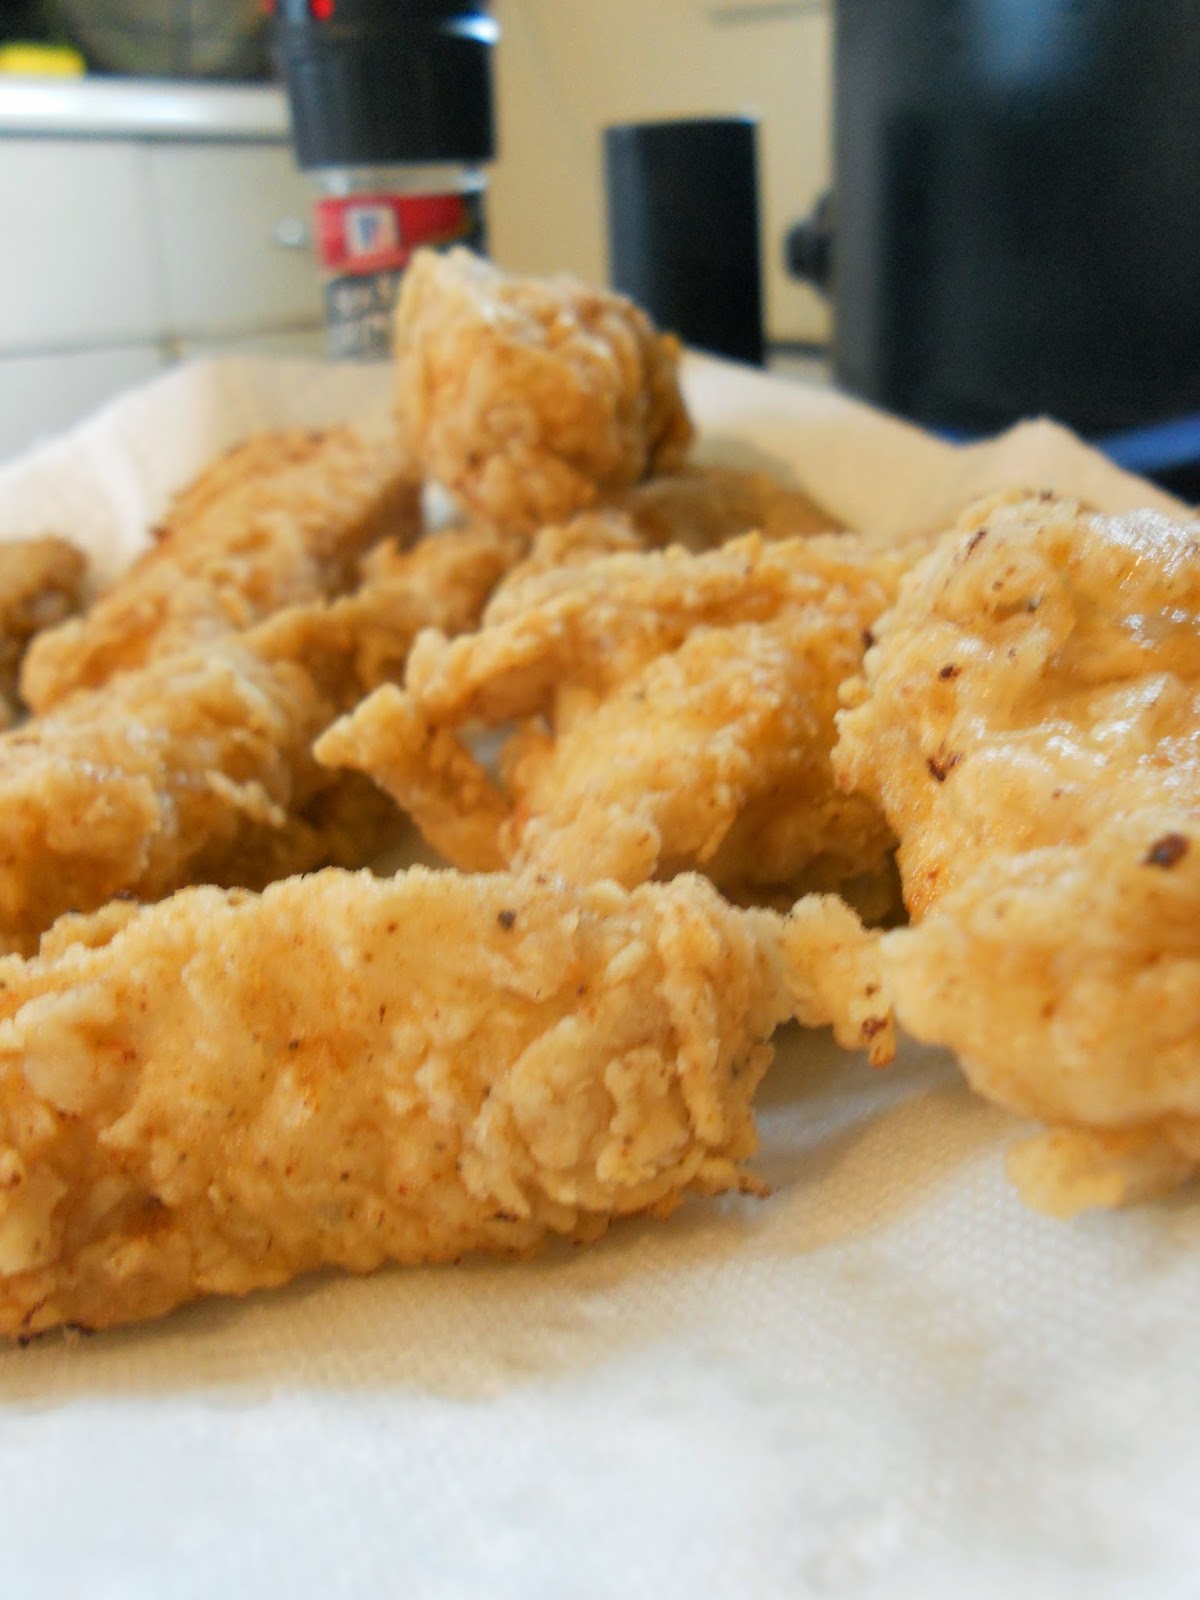
The Very BEST Chicken Fingers You Will Ever Eat!

I'm home sick from work (for the second day in a row) and I just couldn't sleep anymore.  So I decided I had neglected you all for long enough, it's time for another recipe.  I actually have a whole ton of pictures I've taken of recipes I want to share with you, but the past several months my time has been dominated by the final semester of my Master's program.

Now, my thesis is in and classes are completed, so I can once again dedicate more time to you all!  I'm sure you're just overjoyed.

Okay, this isn't why you're here.  You're here because of the title.  I promised the very best chicken fingers you've ever had.  "How can she really make that claim?" you might ask. 

I make the claim because they are that good!  I got the original recipe from The Pioneer Woman.  I had one chicken breast thawed, no vegetables (so I couldn't make my go-to Stir Fry), and a half a container of buttermilk leftover from making cupcakes.  I needed to feed my boyfriend, who was becoming hangrier (that moment when hungry and angry meet) by the second.  I found her recipe for Chicken tenders and it was a light at the end of the tunnel. (You can find her recipe here)

Since that first encounter I find myself keeping buttermilk on hand much more often.  It's a cheap ingredient, but it makes all the difference in these strips.  I suppose you could use an egg wash, but then they wouldn't be the Best you've ever tasted.

Now, the Pioneer Woman—while I absolutely LOVE her—doesn't use too much seasoning for this recipe.  As a (semi) reformed picky eater, I can appreciate the simplicity.  But I thought these tenders could do with a little pick-me-up of flavor.  So I employed the flavor commandments I have learned from years of watching Food Network.

Firstly, that you should—and shall—season at every level of the process to develop deep flavors.

And Secondly, that there is no "wrong" combination of flavors.

So I experimented, and the following is the recipe I came up with.

Best Chicken Fingers of Your Life
Ingredients:
1 large skinless, boneless chicken breast cut into strips (PW gets the pre-cut strips, I find it's cheaper to do the cutting myself)
Buttermilk, enough to cover with about 1/4-1/2 cup left-over (sometimes you can find this in Pint sizes which should be enough—I've yet to find smaller than a quart though)
1 1/2 cups flour
Salt and Pepper (to taste)
Paprika
Garlic Powder
Poultry seasoning

Directions:
1) Cut chicken breast into strips.

2) add 1/2 tsp Paprika, 1/2 tsp Garlic powder, and 1/2 tsp poultry seasoning to buttermilk, as well as a dash of salt and a grind or two of pepper.  Mix together, the buttermilk should turn a light salmon pink.

3) Soak the Chicken strips in the buttermilk mixture.  Let marinate at least 15 minutes.

4) In a separate bowl mix 1 and 1/2 cups flour with another 1 tsp each of Paprika, Garlic powder and Poultry seasoning, as well as some salt and pepper. (Are you starting to see this seasoning every layer yet?)

5) Mix together with a fork.  While mixing the flour, drizzle in a little of the leftover buttermilk at a time (anywhere from 1/4 cup to 1/2 cup in total).  There will be some clumps, which is okay, just try to keep them on the smaller side.

6) Heat 1 inch of vegetable oil in a skillet over medium-low to medium heat.  Check that the heat is correct by sprinkling a little flour over the oil.  It should bubble.

7) Take soaked strips, a couple at a time, and dredge through the flour mixture. Gingerly shake off any excess and set aside.  The clumps from the buttermilk drizzle will cling to the chicken and create crispy bites of fried deliciousness.

8) Once the oil is hot and you have enough dredged, drop the strips into the oil a few at a time—be careful not to over-crowd the pan!  Cook strips about 1-2 minutes per side,or until they get beautiful and golden brown.
I usually dredge the next batch while the first one is cooking.

9) Once done cooking, remove the strips to a paper-towel lined plate to drain excess grease.  Once all the strips are cooked, serve with french fries or potato chips—or just a little side of ketchup or bbq sauce.  Whoever you make them for, they won't stay on the plate for long (unless they're vegetarian...but then I bet you could easily find other things to fry up in this buttermilk dredge)


Once you try these, no pre-frozen diner or fast-food finger will ever measure up.  And the best part is how easy the recipe is to experiment with!  Add your own spices, try some cayenne for a spicy kick, or a little Cajun seasoning for some zing!  Try some 5-spice and ginger for an Asian flare.  Throw the strips on top of salad or in a wrap, or cut them into bite size pieces and serve them as nuggets to the kids.


Tuesday, March 15, 2011

Thyme Pork Chops with Pasta and Garlic Cream sauce


As promised (ok maybe a day late, but it's better than never)the delicious meal I made the other night. Thyme pork chops with pasta and garlic cream sauce. It's so easy and filling. I only have 2 people to cook for so this is a two serving (and nothing is exact) recipe.

Ingredients:
2 pork chops
1 tsp dried thyme
1 pinch of paprika
salt and pepper to taste
Olive oil (or vegetable oil if you're poor like me) enough to coat bottom of pan
1 handful of pasta (however much you normally eat)
fresh or frozen veggies ( I used 1 carrot and frozen corn, but you can use whatever you have on hand)
1 small onion
2 cloves of garlic
Philadelphia Garlic Cooking Cream

How To:
Boil water and throw in pasta.

Season pork chops with salt, pepper, thyme and a pinch of paprika. Heat oil in pan over medium/ med low heat and brown meat. After browning on both sides set chops aside to rest. In the same pan cook onions and garlic until soft. Add vegetables and cover, cooking a few minutes until veggies are thawed but slightly crisp. Stir in several big spoonfuls of Philadelphia Garlic Cooking Cream (you could do it with any of the others too. (Or just plain cream cheese and whatever seasonings you want!)

Drain pasta and add into pan. Toss pasta with veggies and sauce. Pile on a plate and place chops on top. Then just dig in and enjoy! Personally I think this is going to be a new comfort meal for me. I can't wait to make it again, and I hope that some of you out there will enjoy it as well